Wednesday, December 25, 2013

Merry Christmas and our Countdown to Christmas WINNER IS.......

Merry Christmas from US to YOU..

Have a great Holiday season


************************************************************************

We had fun this holiday season counting down to Christmas with you!
Lots of orders were shipped with free goodies, hope you enjoy them.

Many names were entered in our giveaway and we are so excited for.......

mariacreech - from Provo, UT

YOU have won our grand giveaway prize 


Congratulations......

kids floor pfoof. Sewing Modkid book, Fq bundle polka dots and charm pack of sew stitchy.
[we will contact you through etsy]


Thanks to all who entered and for being such awesome customers.


We look forward to 2014 and can't wait to start the new year with our
 FIRST OF THE YEAR SALE
(more on that to come)


Many thanks for being such awesome customers during 2013 
WE LOVE YOU!!!!!


Sunday, December 15, 2013

Countdown To Christmas Week #3


Congratulations if you have received SandH Creates elastic twisty tie pack with your order, 
during week #2 of our Countdown to Christmas.

Have fun wearing them!


Our Countdown to Christmas continues as we continue with week 3.


This week all orders over $25 will get a secret surprise gift.

 hint: both items are used for sewing


JUST A REMINDER
orders over $25 will get the free gift as well as get entered in the drawing

Also, orders over $15 will get entered in our drawing just not get a free gift.
(both amounts are not including shipping)

A reminder of what the winner of our giveaway will get


  and with Santa just around the corner, we want to make sure you get something for yourself, 
so happy shopping. 


Tuesday, December 10, 2013

Countdown to Christmas Week 2

Congratulations if you have received our 4 free FQ with your order, during week #1 of our Countdown to Christmas.

enjoy them!


Our Countdown to Christmas continues as we continue with week 2.  


This week all orders over $25 will get a pack of these stylish fun twisty ties from SandH creates.

It will be a surprise as to which pack you get, but they are all so fun and trendy.


JUST A REMINDER
orders over $25 will get the free gift as well as get entered in the drawing

Also, orders over $15 will get entered in our drawing just not get a free gift.


This is what the winner of our giveaway will get


4 awesome items!!!!!

enjoy week #2 of our Countdown to Christmas


Saturday, December 7, 2013

Quick Square Quilt tutorial

I love sewing with squares, they are fast, easy and look great.


Well......

Do you know a fast way to sew squares together?

I do, and I'm going to share..

IF you don't already sew this way, once you learn you will never go back (at least I love it).

lets get started.

Supplies needed for quilt top:

4 card stock papers (or more depending on how big your quilt will be)
pre-cut 5 inches squares (or any size you like)
washable marker/pen
ruler
rotary cutter
sewing machine/thread


PLEASE READ THROUGH TUTORIAL BEFORE STARTING


You will need at least 4 pieces of card stock or any type of heavy weight paper. More if your sewing a big quilt, but for a baby size 4 will do.


I used 81/2" by 11" card stock


On your card stock you will need to write 2 numbers on the top of each card.  Start with 1 and 2 on the first card.  The next one 3 and 4, keep going till all your card stocks are numbered. If you have 4 card stocks then your last number will be 8. 

I wrote my numbers on washi tape, just cause it makes it prettier 
(I love washi tape).


Next your going to get your fabric ready. 

For this quilt and tutorial I used fabrics from my stash and cut 5" strips from the yardage.
Making 5" squares.

You can use pre-cut charm squares if you're making a quilt from one collection. 

However, cutting your own is also easy.


Once all fabric is cut you're ready to lay out your quilt.

Since this is a square quilt I used 100 squares to make a 10x10 row quilt. This gave me a quilt that is a little bigger than a baby swaddle blanket. Just the perfect size for a baby to grow into.

Lay out your fabrics to how you want your quilt to look.
(for me this is the most time consuming, making sure all
fabric are placed pleasingly)


Now for the part that is going to make sewing this top super easy and fast and where you use your cards.


Take your card labeled 1 and 2.
Start at the bottom end of your quilt with rows 1 and 2.
Begin to lay the very last square in row 1 and 2 on the bottom of your card. 
Proceed to the next square in each row and lay it on the previous square. Layering so you see each fabric.

Continue this process until both rows are layed together on the card. 

it will look like this when rows 1 and 2 are completed

continue on to the other rows using the next card labeled 3 and 4


 continuing on until all the squares are on a card.


 it should look like this, when done..
stack your cards on top of each other with row 7 and 8 on the bottom and row 1 and 2 on top


here is the fun part
you will start to sew your rows together


Start with the card labeled 1 and 2, take the top squares, one from row 1 and one from row 2 

 Sew right sides together like so
 IMPORTANT: DON'T CUT YOUR THREAD
1/4 yd seam throughout 

and continue sewing a row 1 to a row 2 until you make your way through those two rows
Chain piecing so don't cut thread.

Does yours look like this? 


 and this?


  your first
card stock should now be empty


 after you have sewn your last 2 squares 
you can NOW cut the thread


This next step is going to be a bit more time consuming because you will work row by row instead of 2 rows at a time.

Take the next card which will be 3 and 4 and start with the first square of row 3 (top square)


Open up your first sewn rows of 1 and 2  


take the first square from row 3 and place right sides together on top of row 2


begin to sew the squares together 


 REMEMBER DON'T CUT THREAD!

continue sewing squares right sides together BUT ONLY pull the squares from row 3


 continue making your way through the row, sewing right sides together


 looks like this.


 When you get the last square in row 3 cut your thread


This is what is should look like. No cut threads, all in one piece. 
NOTE: if you do cut your thread by accident, just re-join it all
together to create a big piece.


 Continue on to row 4 and do the same you just did with row 3


As you make your way through your rows, it should start to look like this


 Everything connected diagonally, and in one big piece


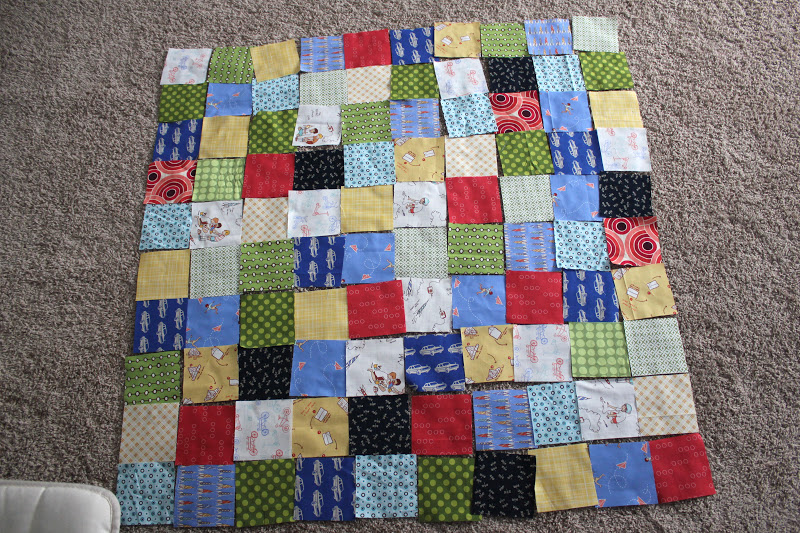
When all rows are sewn, lay your quilt top on floor to admire your work

(..wow that looks good!)


 Nice....


 close up...


After admiring your work, grab your quilt top and head back to your machine. 

We are now going to sew the rows together horizontally, by starting in the middle of the quilt top. Pick a row about the middle and line up the 2 rows right sides together, making sure to line up your seams. 


Being to sew connecting the 2 rows together, using 1/4 in and checking your seams when you get to a square to make sure all are lined up.


Once you have the 2 rows sewn together begin on the next row. I like to work one end first sewing all together then begin on the other half of the quilt top until the whole top is sewn together.


Iron it up and your DONE!!!!!!


 Hope you have enjoyed this tutorial and please send some pictures of your finished square quilt.


I really love how this turned out!!!


I backed this quilt with jade minky dot that can be found here. 


Go make a square quilt using this tutorial and send us your pictures.


Sunday, December 1, 2013

Countdown to Christmas- lots of free goodies! and one huge giveaway


COUNTDOWN TO CHRISTMAS


For the past couple of years we have been counting down to Christmas in different ways. This year we are going all out and giving away TONS of FREE ITEMS!


Starting Dec 1 we will be counting down to Christmas by weeks, which means 3 weeks of free items and the last week 1 huge giveaway.


The giveaway winner will be chosen on Dec 22 and this is what you will win.


4 great items!
(quilt not included)

Le Crème Basics, CREAM Cotton MEDIUM Dots by Riley Blake, Pre-cut FQ bundle 11 total


Sew Stitchy Charm Pack


Autograph copy of Sewing Modkid Style from Patty Young

 and last but not least

THIS AWESOME....


Toddler/Kids size floor pouf created by Sarah from S and H creates
This pouf is very 
gender neutral with mustache and chevron fabric.


This pouf also comes with a carrying handle, 

too cute!


All these items value over $110.00


SO HOW DO I WIN THE GIVEAWAY?
Each time you purchase over $15 (not including shipping) during our countdown to Christmas your name will be entered in our drawing. The more times you purchase, the greater your chance of winning. For example, if you purchase each week (3 weeks) your name will be entered 3x, giving you a greater chance to win.


HOW DO I GET FREE STUFF AND HOW MUCH DO I NEED TO SPEND:
For all 3 weeks all orders over $25 (not including shipping) will get a free gift(s) included with your order. As well as get your name in the drawing. Remember the more times you purchase the more entries you will get, also the more free items if your order is over $25.

Here's what you will get included with orders of $25! (not including shipping)

Week #1- Dec 1-Dec 7
these 4 Fat Quarters a $13.50 value


Week #2 - Dec 8- Dec 14
a Surprise Set of 3 No Crease hair twisty ties from SandH Creates  


these are so cute! they make great stocking stuffers and I absolutely wear mine daily. 


Week #3- Dec 15- Dec 21
???????????????????????????????????????????????????????????????????????????????????????????????????????????

SURPRISE -it's going to be good!


Week #4 Dec 22 -Giveaway winner will be chosen and announced.


Wow!
We are so excited for you to be getting all these free items, just make sure your order total is $25 (not including shipping) and the item(s) for the week will be included in your order. 

also your name will be entered in our giveaway for orders over $15
 (not including shipping)

if you have any questions leave a comment and we will get back to you.


HAVE A HAPPY START TO OUR COUNTDOWN TO CHRISTMAS!!!!!!!!!


LinkWithin

Related Posts Plugin for WordPress, Blogger...